How did we get here?
Well I was a bit too busy and neglected my duties in using rust preventative products like Dinitrol and Waxoyl as an annual application to both prevent further rot and protect all the repairs I had made previously, It didn't help that I found a previous owners repair that was sub par to say the least 😠
This was the "repair".

That will be a strip of aluminium pop riveted over a hole in the wheel arch.

And that was the bloody gaping hole that I discovered behind it 🙄
So how did I end up doing the sills?
Well I found a bit more rot once I had started to dig around a little bit, and I found this.


Bash with a hammer to see how bad it all was and it wasn't good.

Quite a build up of silt in the back of the sill.

But this was the rear sill body mount on the drivers side,it was completely rotten and had no strength what so ever, I was going to just cut it out and replace the body mount and plate up the sill but thought better of it, do it once and do it right.

I decided to order a set of body mounts and new bushes to make the fitting of the sills much easier and faster.


I ran a bead of weld along the open edges of the two plates that make up the mounting plate for the bushes, with a bit of luck that will stop any water ingress between the plates and stop them rusting away from the inside out.

Chop, chop, chop and start cutting it all out.


The A post had to be cut back quite a lot more than this to get the box section in but it is amazing how bad this is considering it was all cavity wax coated when it was first repaired.

Test fitting the body mounts to see how the fit up was with the box section.


Little bit to cut off the 120X60X3.6mm in 1.5m lenths, this rectangular box section from The Metal Store was both perfect for the job and sourced at a very competitive price delivered straight to my door.


This is the rear end of the sill that I deliberately angled to continue the same line as the wheel arch.

When I test fit the box section I found that there was a 2mm gap between the body mount and the new sill and I took the opportunity to use a piece of 2mm plate to pad it out, all fully seam welded in to stop any water ingress behind the panel.


Both pieces welded in and the sill fitted up, start blazing away and welding it in.


This was the start of the welding up of the body mounts after first tacking them initially once I was happy with the fit up.

Although the A & B post bottoms are readily available from YRM I actually prefer to make my own as it is cheaper and usually faster as I am not fighting the rather random build tolerances given by Land Rover in order to get a decent fit up, first the two side pieces.

Then plate it over to the bottom of the sill.

Notice the slight forward angle, that is deliberate and the weld is stopped 10mm short so that I can beat a round punch in and open it up as a drain for any water or gunk that gets in there, of course, the door posts will again see an internal dousing with cavity wax to try and protect the new panels.

I'm a long way from finished but I decided to paint it all with primer to prevent surface rusting in between my sporadic attack sessions.


More to come in a few days, watch this space.
Well more than a few days passed, the weather has been total trash this winter, admittedly it's winter but it has been exceptionally wet and windy for weeks at a time.
But I have cracked on when and were I can, got the spot weld drill out and removed some old panel off the B post.


Welded up.


Slapped some Bond Rust zinc rich primer on.

Still needed to get the seal setting strip cut and welded in for the drivers door.


Next up were the boot floor side panel pieces, get em roughed up with some 80 grit and wiped down with meths to de-grease and remove dust and detritus from the rub down.

Aaaaaaaaand paint.........

Thought I better get one side welded up at least LOL

Painted it too.......

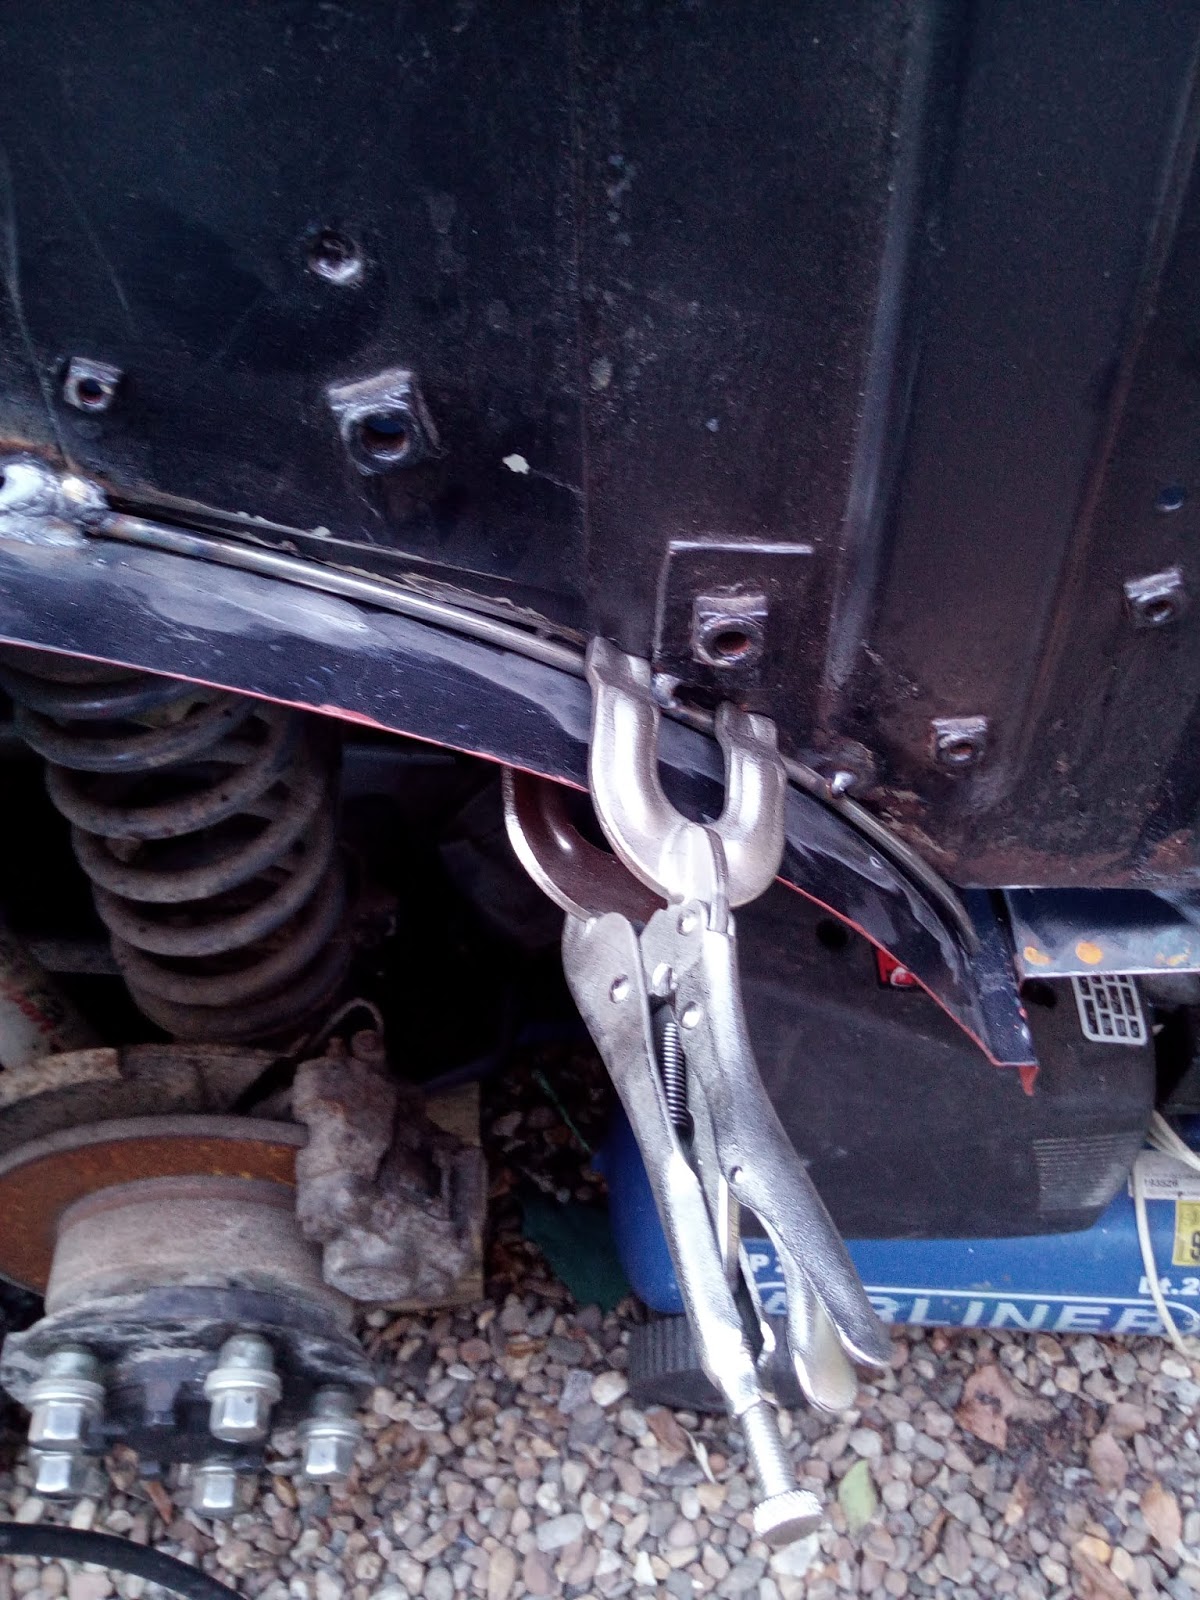
This is the setting up of the welding clamps to hold it all straight, drilled out the spot weld holes and lined it all up, blaze away.


Once it's welded up then smear a good bit of seam sealer over the joints to seal them and prime it all over again.


Found that the rear drivers side body mount was totally rotted out as was a small section of the rear body cross member, nothing more I could do, chop it out and weld in some new metal.


Nice shiny new body mount all welded in and primed.

Seems my upside down welding has improved for the rear body mount welding in.

Now I could get the side panel and wheel tub welded in.


Quite a bit of a gap here, need to find a solution for that.

Solution comes in the shape of some 6mm round bar, get the welding clamps out again and blaze away.


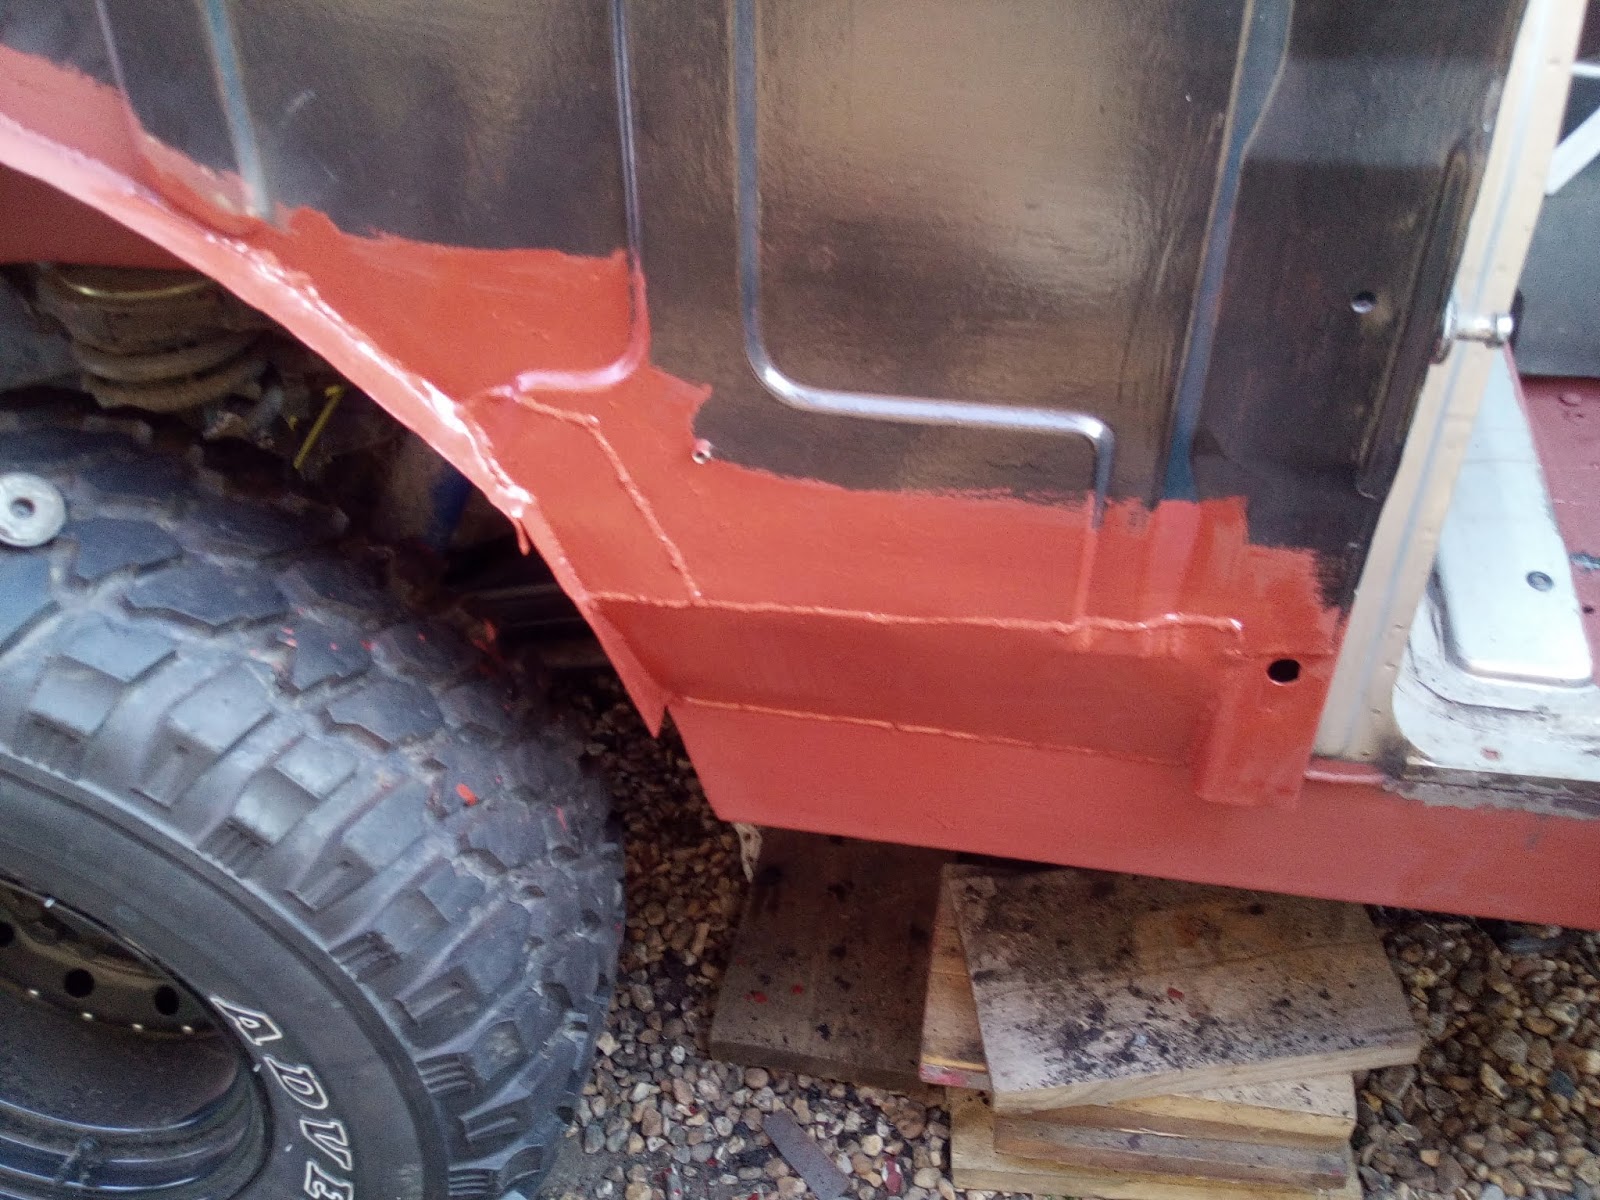
The front of the rear quarter needed to be plated up next and I had a few options, opted for the single plate diagonal down to the sill from the panel, came out lovely.


Got the top coat on the front inner wing and plan to get the rest of it painted up with top coat before I move on with getting the outer rear quarter panel fitted back on and then on with the passenger side, we're really making headway now the inclement weather has abated.

Drivers side front wing back on after cutting back that bumper side piece.

I got the rest of the inner rear quarter painted with top coat and it came out quite nice, fitted the rubber fin seal on the lip edge of the wheel tub and gave it a good smear with sealant to curb water ingress and eventually rotting it all out.


And the door pillar cover trim.


That cover trim had to be repaired before it could be fitted up, the small metal clips had separated from the trim and I had to fix them back in place with a couple of globs of epoxy and fitted it up with new plastic panel pins.

Over to the other side, first the front wing came off.

Pain in the hole as I had forgotten about the extra fittings and stays that hold the front lower edge to the bottom of the battery box and the the lower rear edge to the bottom of the foot well, the little spire clips needed to be removed so I could get the corrosion cleaned up properly and the steel inner wing panel painted.


All scraped off and I set about everything with the meths and a rag to clean and degrease it ready for priming and ultimately painting.


With the front inner wing satisfactorily salvaged and painted I turned to the next bit, everything has to be in bite size chunks, this is a big meal to swallow.
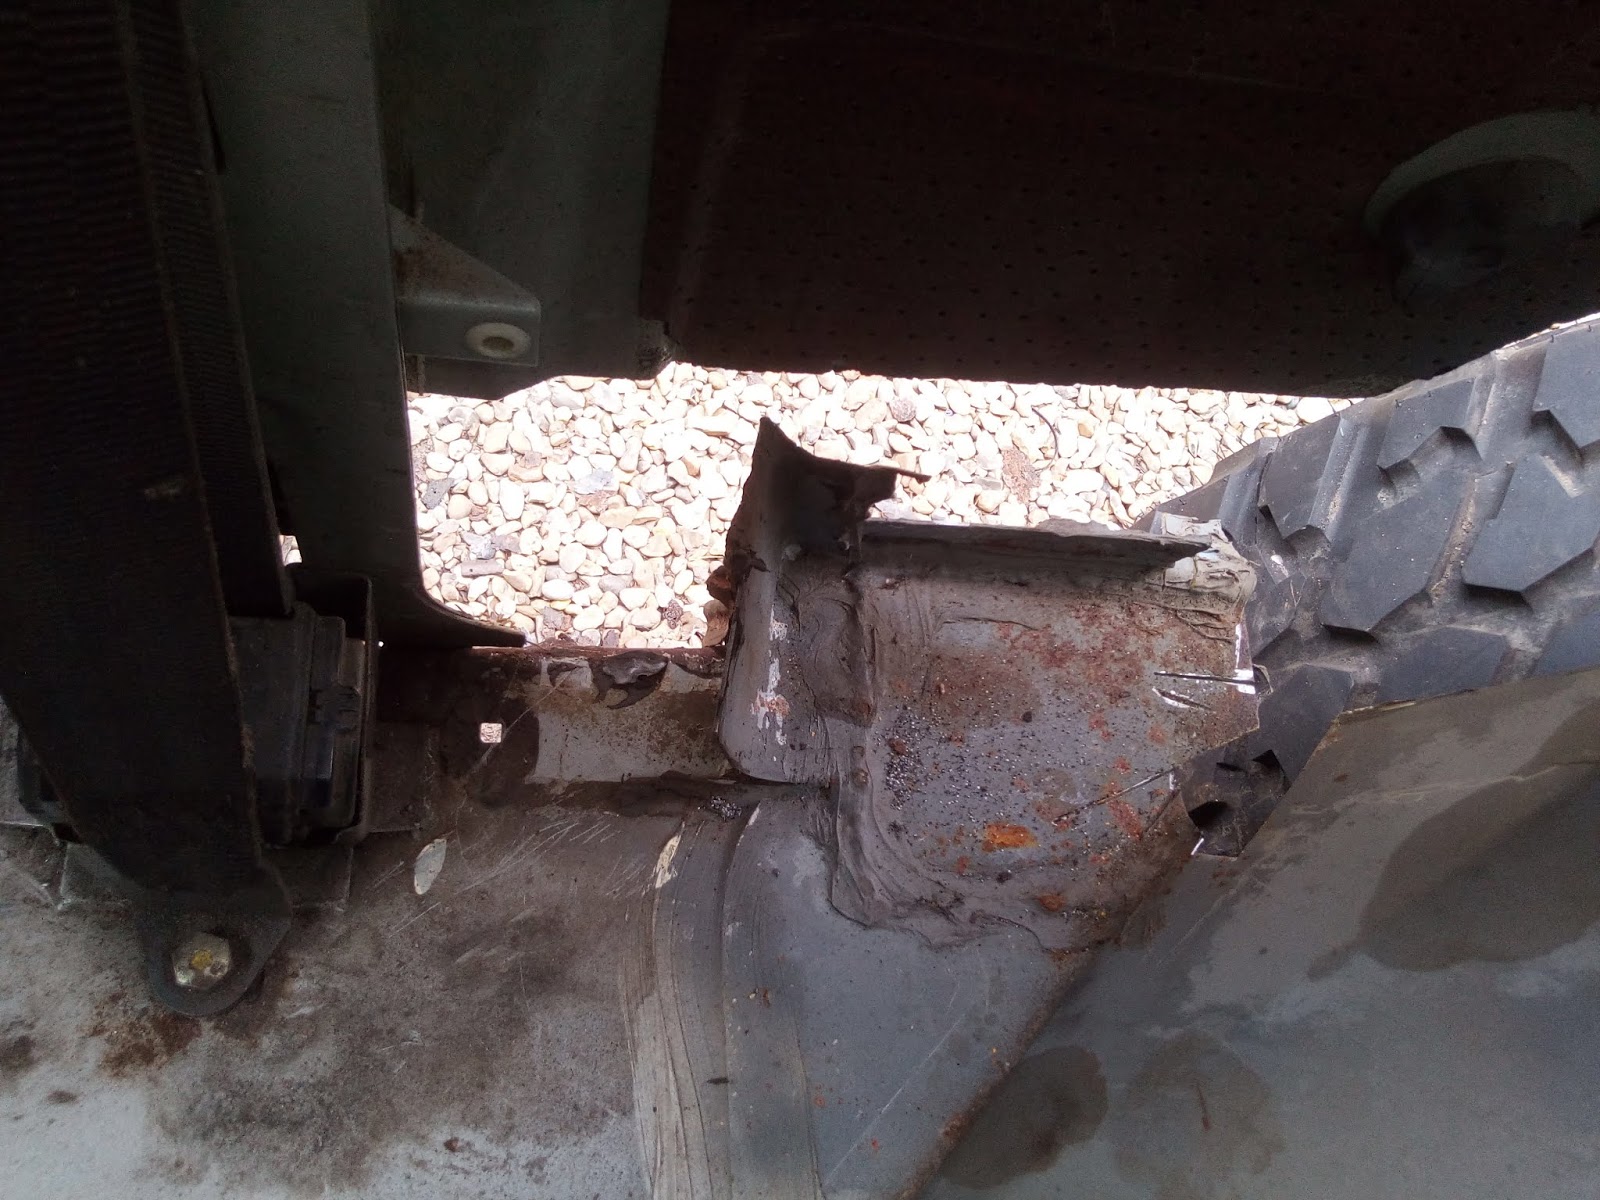
Lets start with the rusty bits we can see and what I found once the sill cover trim came off.


The off side body mount on the rear cross member is totally shot.


The sills are ridiculously shot to bits.


Off comes the rear quarter panel to see what horrors we find under there.

It's bad, real bad.


This was the real kicker, this is far, far worse than I had ever thought possible.
If I am being honest, had I found out that this thing was as bad as it is and started this side first then I am sad to say that I would have scrapped it almost a year ago, I love it to bits but this is insane.
But I was already 2/3rds done and I had all the parts to do it, the back door post was the worst bit.


The rot has spread into the roof too.


Oh well, leave the worst for last and see if I can find a salvage parts for it.
But in the mean time, lets crack on shall we.
Disc cutter and the reciprocating saw to the rescue.


Rot cut out and time to get the box section ready, cut to size and capped off with plate.


I fitted up the body mounts on the outriggers and found that there was a 5mm gap between the box section and the body mount, I had some bar stock in the stores and it was just the right size to take up the slack.


Getting it all tacked in to start and then fully welded in.


Plate the foot well up and crack on.

Gotta get it primed to keep the rust at bay.

Under the floor there is an angle plate that has the rear brake pipe bulkhead fitting that goes through it and although I had made a new one years ago, the floor around it had rotted away so it was time to make a new one and get it replaced.

Cut to shape and bent I used a step drill on hand to drill out the hole for the brake fitting and the folded tab is used to house a cable clip that tidies up some cables that run to the back from the bulkhead.


The only good use for black sealant on a Land Rover is it's use for seam sealant over the welds.

Time to get that ready welded wheel tub and side panel welded in.


The back passenger foot well now gets a bit of attention so that I can continue to build it backwards to the conclusion, laid some nice beads of weld in there.


You can get pre-made door post repair feet but I like to make my own and these ones came out lovely.


Last bit on the wheel tub to the rear quarter panel where I ran of time last time.

The rear most panel of the inner rear quarter panel needed quite a sizeable repair panel welded in and it went in flawlessly as it should.

So that will be that all welded up, primed and seam sealed.

Left the primer and seam sealer to dry and came back to slap some black on it later.


Now came the fun bit, time consuming, irritating and down right annoying.
You guessed it, spot weld drill and assorted goodies, oil bottle, hammer, chisel and a dot punch to centre the spot welds to make it easier for the pin point of the spot weld drill to locate.

Had to get creative with the use of my 1/4 drive extension, a deep 7mm socket to lengthen the spindle so as to stop the drill chuck fouling the post.

Ready, set and go, go, go.....


TIME.......
I won, it's off and it was very light with having shed most of it's weight in rust flakes lol

Under that pile of rust on the the rear body cross member is a load more work to come.

The inner panel is in amazing shape and relatively rust free due to it's early in life Dinitrol application from a loving owner.

Here you can see more evidence of the Dinitrol wax inside the box of the post.

OK, so it's off but this is the corner of the roof and I need to make a plan before I get too excited.

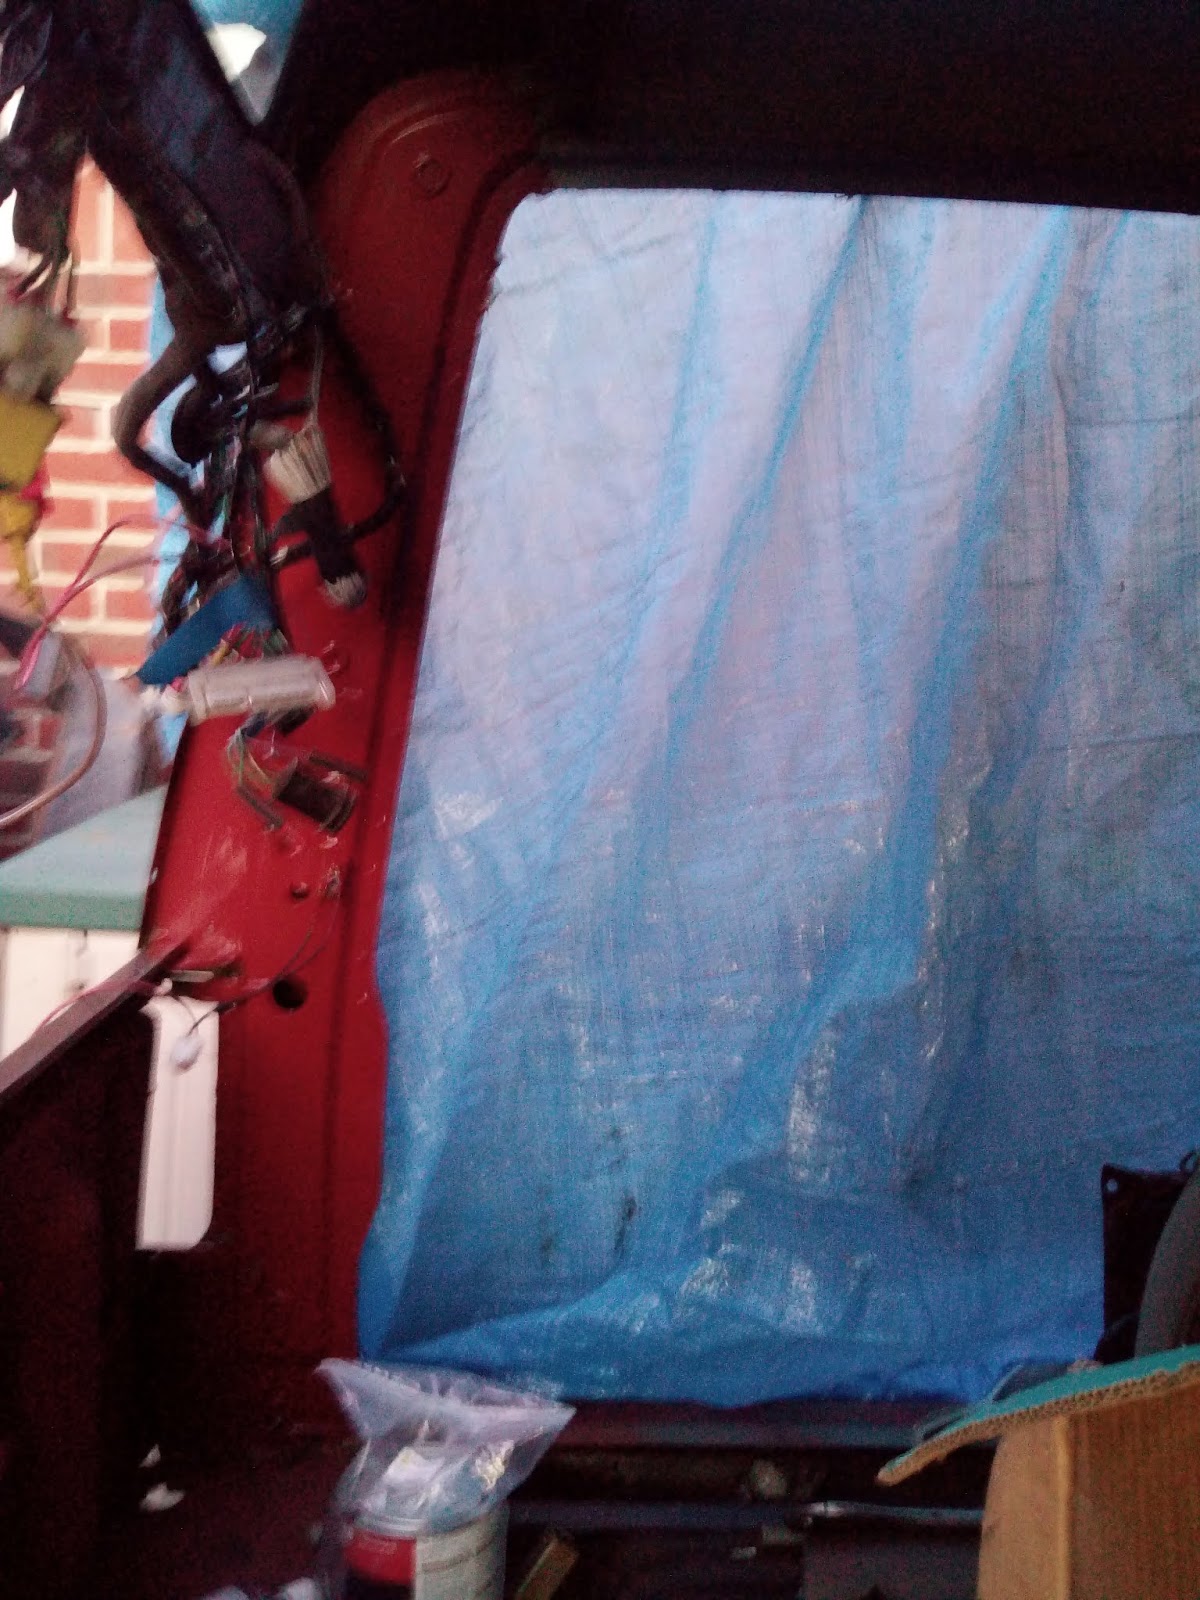
Back on it again, It started off so well when I got up but started to rain, couldn't hold off as it's needing done asap.
Bit Heath Robinson but the old blue tarp came in handy.

Salvage panel being split from the excess that I cut off the scrapper.

Inner panel ground back and ready for a test fit.

Test fit and it was golden.

Before I could get on and fit the new panel I had a small patch of rust to repair in the rear body cross member.

All welded in and welds ground back.

Quick blast over with weld through primer to try and offer some protection to the panels prior to welding.

Double whammy pic, the roof panel is in a sorry state where the old panel was spot welded into the roof and rotted from the inside out, need to plug those holes and the holes left from drilling out the spot welds. Oh and now I know what it is for, this is my new favourite welding clamp lol

Ta daaa......
All welded in and it's had a blast of primer too.


The inside of the existing panel showing that the welds had good penetration and that this was a good solid repair.

Quick lick with primer to stop the spot weld from flash rusting.
I also managed to get the fin seal on the wheel tub, good smear of sealer to stop ingress of water and muck and rusting out of the panel again.

Getting there, one weld at a time.