Monday, 23 September 2013

Progress with wiring

Dismantling any vehicle can be a daunting nightmare for the inexperienced DIY mechanic, and I am lucky in having had much past experience of vehicles and especially Land Rovers.

I had started to dismantle the interior to get a better look at how bad the wiring really was, and yes I knew all about the wiring and some of the rust in my project vehicle but there are a lot of other things I did not know about and they are the most annoying things that the seller simply omitted when selling the car to me, and yes a few of these faults had I known at the time would have been deal breakers for me, either vastly lower offer or more likely, walk away.

But here we go.

With the dashboard removed I could fully assess the burnt wiring loom and see how bad it really was with the relays


As I began dissecting the wiring loom I actually wondered what on earth I had bought but as I had figured out most of the system and what wires went where I thought it should only get easier from here on, so there was lots of cutting and soldering of wires, new loom needed building up to replace the burnt out L/H side loom and a great many of the wires needed to be cut away and new sections of cable grafted into place, the earths and fuse box were badly charred but became functional again after my magic touches.


This was the new loom now fully installed and note there are two extra wires in the system too, this is to kind of future proof the loom for the future roof mounted console to powered and it made sense to add them now rather than at a later date when I do get round to building something.


The relays caused me the biggest headaches as I had no idea what they were for nor did I have much of an idea what color the wires were under the black scorched plastic, but I broke the code and got a brand new genuine parts relay to fit for the wipers and although I do not know what the other two relays were for I know that all of the electrical system works as it should now.

Click this link to see Rusty run for the first time in over 7months!!!

http://s1186.photobucket.com/user/dieseldog69/media/Rusty25262728-10-12015_zps2facf359.mp4.html

And from this mile stone I now have to attend to the welding issues.

The Beginning.

This is the story so far of my 1992 Land Rover Discovery Rusty.

I was looking for a new vehicle that I could turn from a rag to a rich, and I would like to share my journey with you.

This is Rusty when we first went to view him.


He had been standing here for almost 6months after a mechanic who was contracted to make the weld repairs set him on fire and subsequently burned out most of the under dash wiring looms and fried a number of relays too.

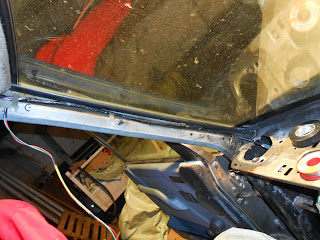
This is him now standing at my barn ready to be dismantled and assessed to show the full extent of the work needed.


In the picture below you will see a badly placed repair patch, it has been bent and touches the bulk head, there is a spot of weld to bee seen that is just in the shadow of the cable, it was this spot of weld that burned through the bulk head and set fire to the sound deadening and insulation under the dashboard, a careless mistake that could have easily have been avoided.


I originally liked the 15" compomotive alloys he came home with but when I wanted to buy two new tyres to match the front two I hit an obstacle, they were no longer manufactured, so I changed them completely for new wheels and new tyres, you will see those a little later on.


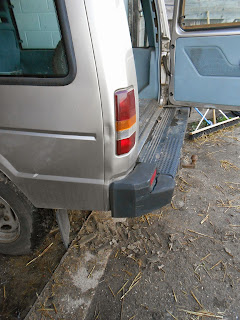
This truck has seen a few bangs and scrapes along the way too.


And the dismantling begins to show how bad things really are.....