So with that on my hands and still wanting to winch on a regular basis, what should I do?
A few minutes internet searching resulted in the discovery of Gwyn Lewis 4X4 out of Wales, UK.
Gwyn Lewis 4x4
They are an engineering company that designs and build in house the very best in extreme off road accessories for Land Rovers and a few other marques too.
So lets us get into what went into fitting the kit. What did I get and what did I need?

The full kit above is everything you need to fit a second alternator to a bog standard 200Tdi engine, so what came in the kit?
Crank pulley, this is a genuine part for 200Tdi engined vehicles with air conditioning.
Crankcase cover injector pump cover plate replacement idler pulley mounting stub, this is also a genuine part.
Idler pulley, again a genuine part for air conditioning.
Drive belt, also a standard part for vehicles fitted with air conditioning.
The Gwyn Lewis fabricated alternator mount and tensioning arm.
Water pump bypass hose guard.
Bag of hardware.
Aftermarket 100 amp alternator.
Wiring diagram and fitting instructions.
There are also comprehensive fitting instructions available on the website just in case you misplace yours as I did.
I used the opportunity to fit this when I replaced the timing belt on my vehicle as you have to remove the crank pulley in order to replace the single belt pulley with the supplied twin belt pulley so this post will show what we did with both replacing the timing belt and fitting the second alternator.
Lets begin, I am not paranoid but I have seen far too many times damage to radiators from a slip or an accidental mishap with a tool or a component, so I always start by draining the coolant and removing the radiator and intercooler along with the hoses.


Then remove the auxiliary drive belts from the alternator and PAS pump.

Remove the Alternator and PAS pump, then remove the mounting bracket from the timing belt housing and the engine block.

Crack off the crank pulley bolt using a 30mm socket and big breaker bar under the chassis rail by disconnecting the fuel stop solenoid and flick the key and the starter will crack the bolt for you.

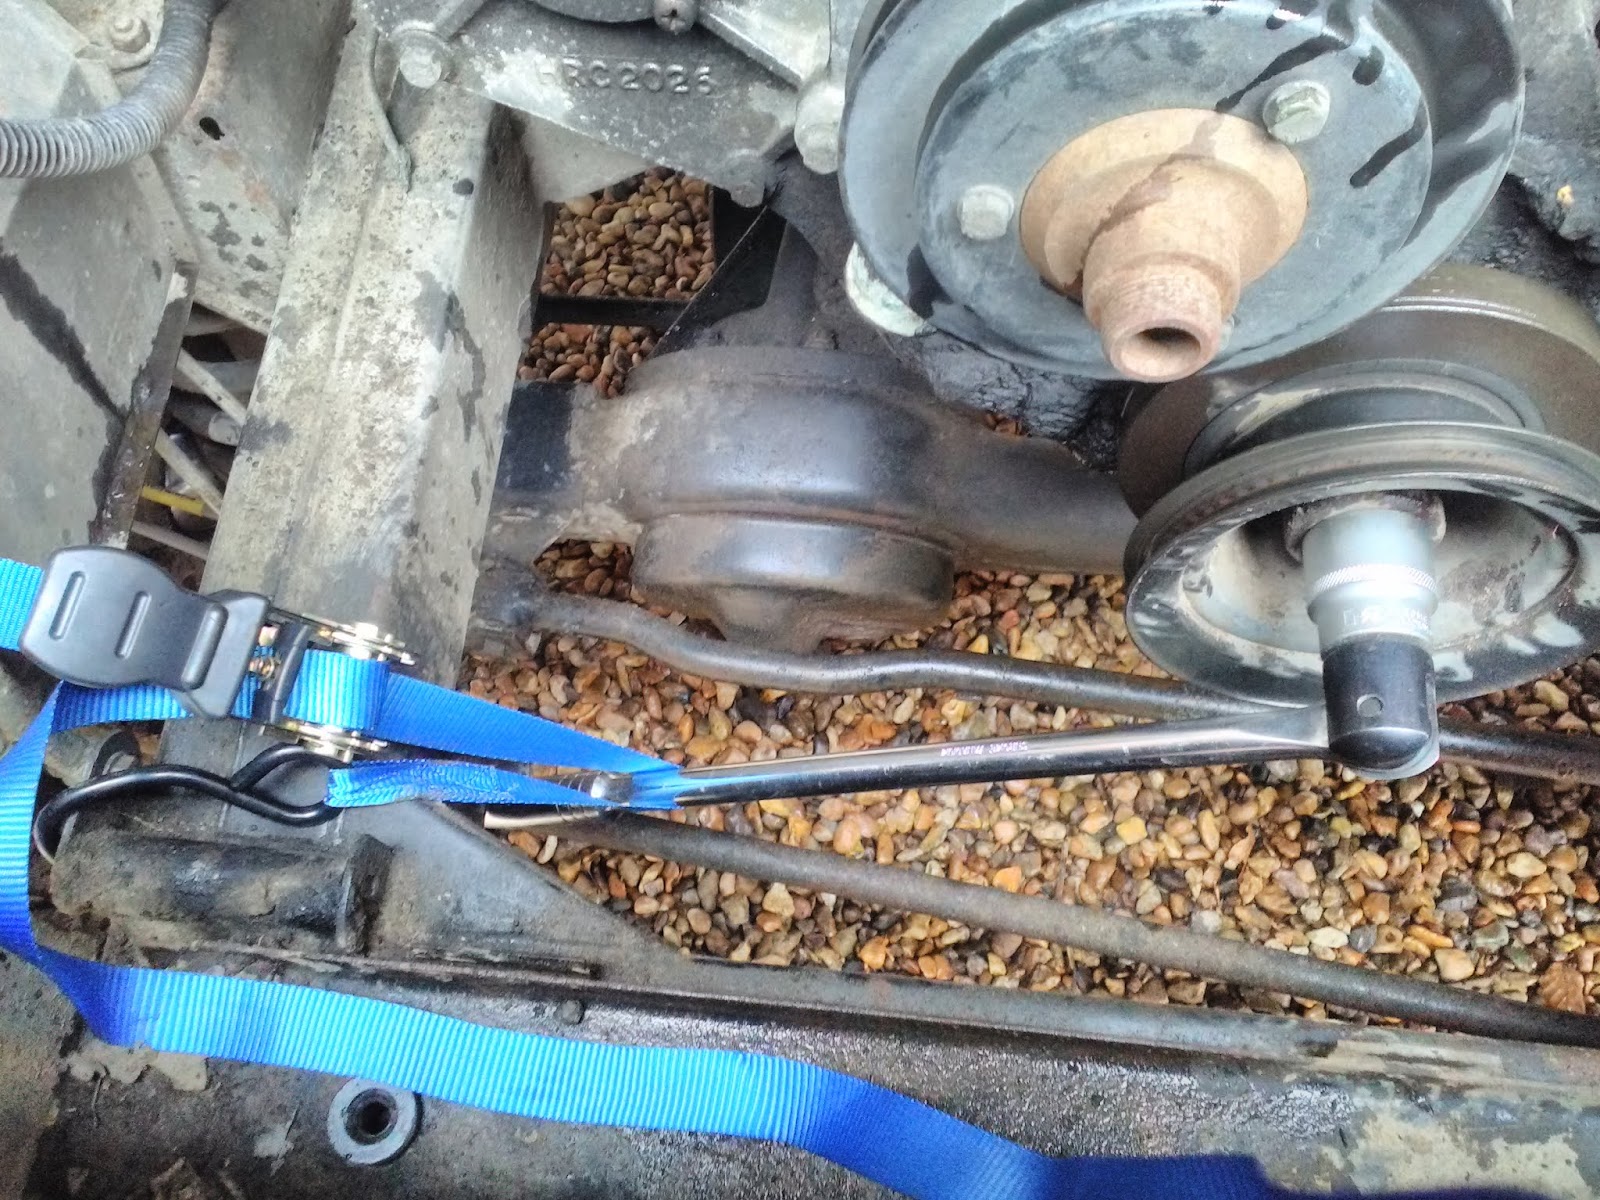

Remove the water pump and run a tap through the timing case cover and then remove the bolts and the timing cover.

The inside of the timing case was disgusting and I was wise to have already ordered in genuine seals and gaskets for the timing chest, it could well have been the cam seal but also the crank oil seal that had aged and started to weep, a little bit of oil goes a long way it seems.


Setting up the timing of the injection pump with a 9.5mm drill bit, there are proper timing pin sets out there with the right pins etc, but they are a lot more expensive.

Timing the cam to the web on the timing case.

A timing pin to time the crank from the bell housing breather plug.

Then once all the components are locked in place, pull the cam and crank sprockets off and set about cleaning up the internals of the timing chest before removing it from the engine for fitting the new seals.

The back of the timing chest also needed a good clean too.

This is the coolant gallery that passes right through the timing chest from the block to the water pump, I was quite disappointed by the poor finishing of the castings and used a couple of different files to dress the rough edges back and improve the flow of coolant.

This is the new genuine parts cam oil seal fitted in the timing chest.

This is the new genuine parts crank oil seal fitted in the timing chest.

All done and ready to go back on.

There is also a crank oil seal on the timing chest cover and as you can see I have also used a genuine parts seal here to ensure longevity.

All cleaned up and any old traces of gasket removes and ready to be fitted.

The block face was all cleaned up and old gasket traces were removed, you can see on the top right side of the block the new coolant gallery gasket, I had a small leak here and it was necessary to replace this, the block to chest gasket is a little shiny from the grease smeared on it that will help seal the gasket against the timing chest, there is also a small circular disc gasket that is in place where the tensioner bolt goes through the chest to the block.

I refitted the everything including the new crank pulley but not with the rest of the second alternator kit as I wanted to go off roading with friends the next day.
Off roading out of the way, this is the second groove that the new aux belt will run in.

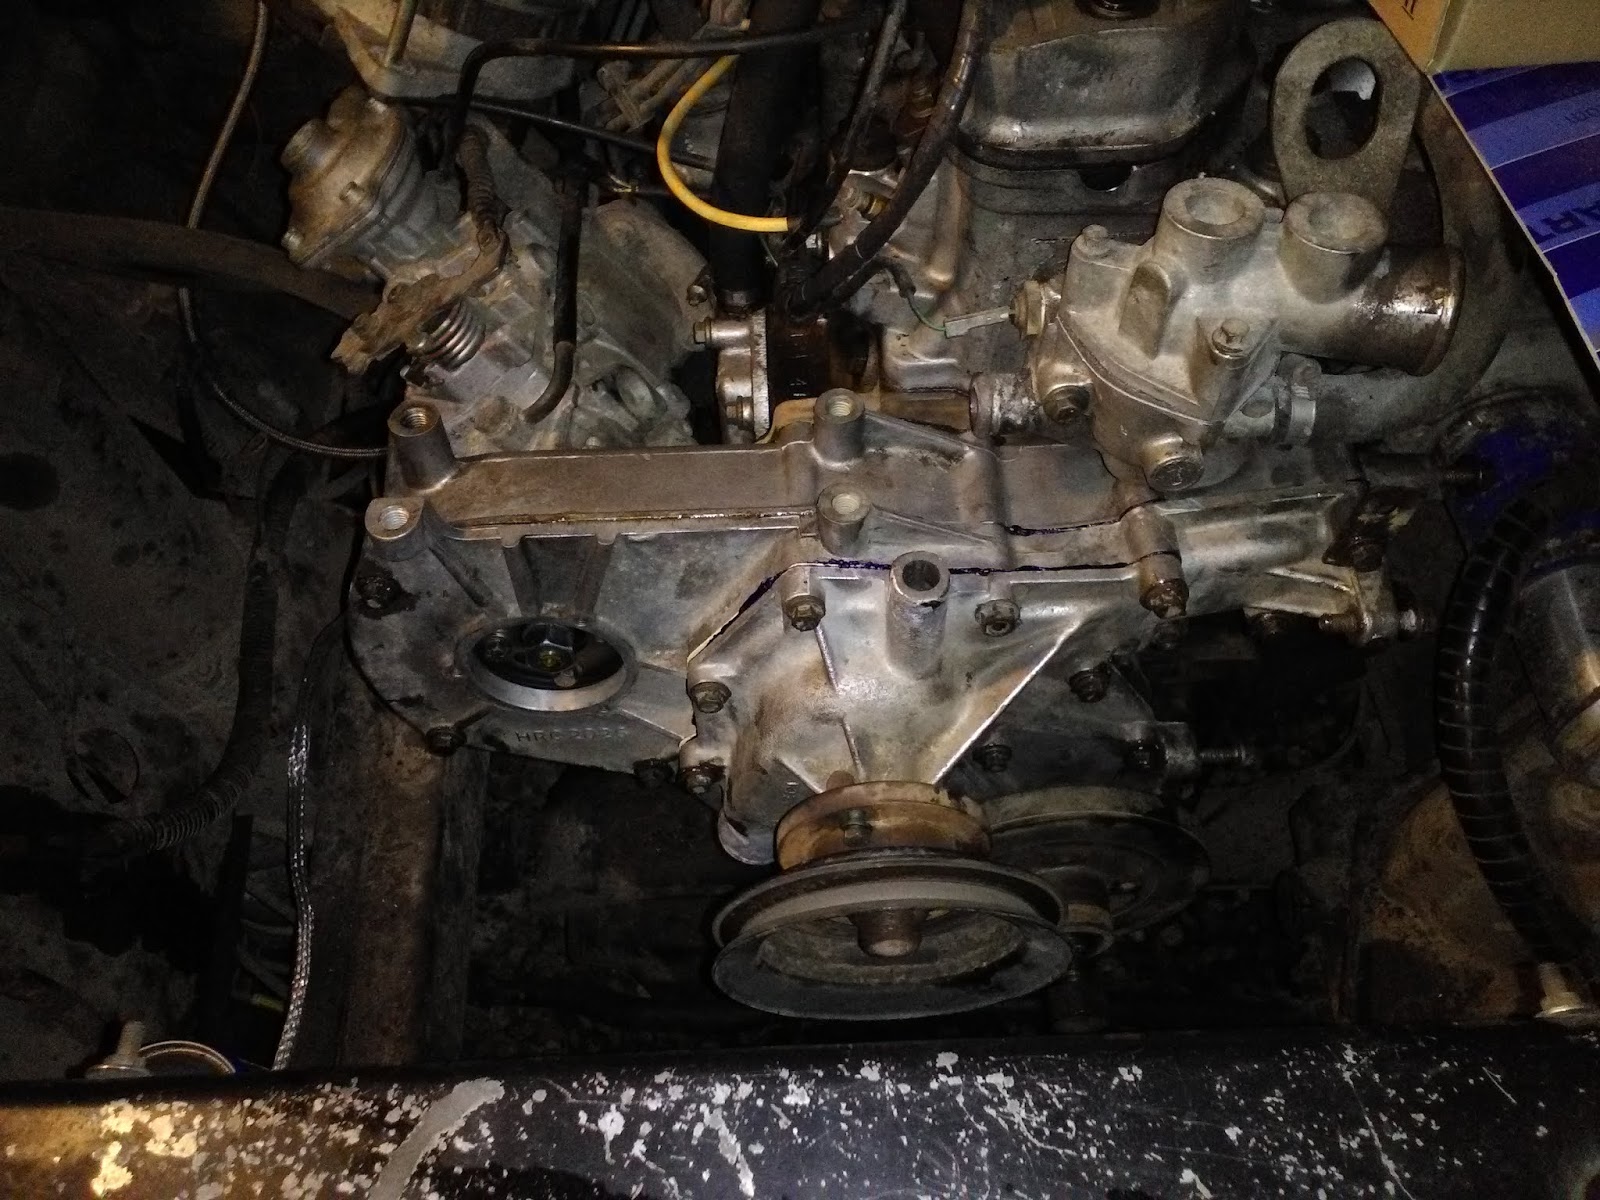
And here we go, last look at that wide open space that I am about to fill with a load of new equipment.

You'll see this mounting stub with it's swivel elbow breather on the timing case above, nice touch that it already comes with this fitted as it helps when we have the wading plugs fitted. Oddly the timing case has an 8mm od fitting while all others use a 6mm fitting.

The mount is fitted to the top of the timing case using the cast, drilled and helicoiled mounts that would ordinarily be used to mount the air conditioning compressor.

The alternator requires a separate earth as the mount itself is heavily powder coated to protect it from corrosion, the extra earth cable is always a good idea and this earth connects to a secondary earth cable that actually goes to the chassis and the main battery cable.

This is the idler pulley that is used to usually tension the static mounted air conditioning compressor but in this application it is simply used as an idler not a tensioner.

The idler pulley mounted on the lug on the front of the timing chest cover.

The alternator tensioner arm and water pump bypass pipe guard are spaced out from the mount using 4 washers and may require a little bit of bending to get the perfect fit but it is a very close fit and Land Rover had very varying tolerances LOL

All fitted with the aux belt and roughly tensioned for now but it will be tensioned properly once the belt has had a short run in period.

The 35mm2 cable with the cable lug crimped on and a short heat shrink over the tail all ready to fit to the alternator.

The routing of the cable utilised a couple of plastic "P" clips to hold them in place with a short piece of cable sheath for protection.


With the alternator fitted and the heavy cable run to the aux battery it is time to tackle the more technical part of this excise!
That's right, getting it wired in to the system, cue pulling out the fuse box to enable me to take a proper ignition live feed to run to the relay that will switch and power the exciter wire when the ignition is turned on.

I try to use proper wiring plugs when I wire items in to my truck and this enables me to keep the wiring tidy and when trims are removed the cables can be easily unclipped.


This is the instrument binnacle surround where the volt meter and second alternator warning lamp are mounted, nice and easy to see and I tried to use good quality components at all times.

As always it's advisable to use fuses in new wiring and here we have a one way diode that stops current being drawn backwards from the battery, it wouldn't happen anyways as there is a switching relay in the circuit but if there ever is a failure this is a simple device that will prevent and isolate the problem.


All up and running and the new alternator kicks out a healthy 14.6V and the lamp extinguishes almost immediately as the engine spins over.

I hope this was informative and if you have any advice or tips please leave a comment.
No comments:
Post a Comment